How to Scan Your Containers for Vulnerabilities with Free Open Source Tools

Generating a vulnerability scan for your containerized applications as part of your DevSecOps process is an essential technique to help secure your software supply chain. Vulnerability scans are critical due to the growing prominence of supply chain attacks such as Solarwinds, maintainers intentionally adding malware like node-ipc, and critical vulnerabilities like Log4Shell.
Due to the high nature of supply chain attacks in 2021, President Biden issued an Executive Order on Improving the Nation’s Cybersecurity. It details guidelines to secure software for any federal departments, agencies and contractors that do business with the government. Among the recommendations outlined in the executive order, the requirement for automated tools to uncover vulnerabilities (i.e. vulnerability scanners) have been clearly stated to ensure safety and regulations for software supply chain security used by the federal government.
Fortunately, there are a number of tools that can create vulnerability scans and generating your first one takes just a few easy steps.
Open Source Vulnerability Scanners
There are many tools available for generating vulnerability scans, so the first thing you’ll need to do is pick one to use. Vulnerability scanners are often specific to a particular ecosystem such as Python or Go. Some are capable of generating scans for a number of different ecosystems and environments. Some of the more popular vulnerability scanners are:
- Grype by Anchore
- OSV Scanner
- Clair
- Dependency-Track
For this example we’ll focus on Grype, since it is easy to use in many different scenarios and supports a variety of ecosystems. Grype can run on your desktop, in CI systems, as a Docker container and scan a wide variety of ecosystems from Linux distributions to many types of build dependency specifications.
Getting Grype
The first thing to do is download Grype. There are a number of ways to do this:
Using curl
The recommended method to get Grype for macOS and Linux is by using curl:
$ curl -sSfL https://raw.githubusercontent.com/anchore/grype/main/install.sh | sh -s -- -b /usr/local/binHomebrew
For macOS, you can install Syft using Homebrew:
$ brew install grypeDirect Download
You can directly download Grype binaries for many platforms including Windows from the GitHub releases page.
Docker
There is also a Grype Docker image with every release: anchore/grype, which can be run like this:
$ docker run -it --rm anchore/grype <args>Validate the Grype Installation
To confirm Grype was installed correctly, simply run:
$ grype versionYou should see output similar to:
Application:          grype
Version:              0.65.2
Syft Version:         v0.87.1
BuildDate:            2023-08-17T19:39:41Z
GitCommit:            brew
GitDescription:       [not provided]
Platform:             darwin/amd64
GoVersion:            go1.21.0
Compiler:             gc
Supported DB Schema:  5
Note: Grype was version 0.65.2 at the time of this writing
Generating Your First Vulnerability Scan
Once you have Grype installed, creating your first vulnerability scan is simple. Grype supports multiple sources when generating an vulnerability scan; choose from using an SBOM, scanning a local filesystem directly or a container image. The advantage of scanning an SBOM over a container image or local filesystem scan is the amount of time it takes to complete the task.
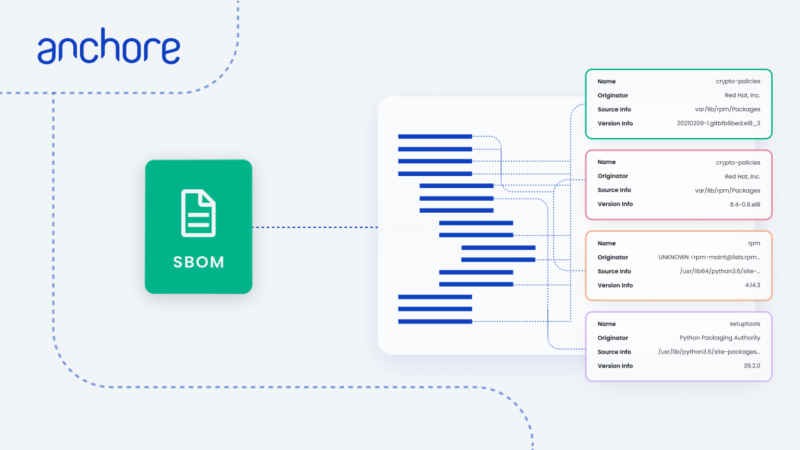
An SBOM is an artifact of a filesystem or container that stores metadata about its source and all of the individual components that were used to build the original source. Think of it as a nutritional label on a can of soup but for software. By scanning the ingredients label for vulnerabilities rather than re-processing the entire container, we can save an immense amount of computing power and enable the ability to scan the container more frequently as new vulnerabilities are discovered.
Scanning an SBOM
To generate a vulnerability scan for an already existing SBOM:
$ grype sbom:<path/to/sbom.json>Or you can pipe an SBOM file directly into Grype, here is an example with an open source SBOM generator called, Syft. If you’ve never used a tool to create an SBOM, be sure to check out our guide on how to generate an SBOM:
$ syft <image>:tag -o json | grypeScanning an Image
To generate a vulnerability scan for a Docker or OCI image – even without a Docker daemon, simply run:
$ grype <image>By default, output includes only software that is included in the final layer of the container. To include software from all image layers in the manifest, regardless of its presence in the final image, use the –scope all-layers option:
$ grype --scope all-layers <image>Scanning a Filesystem
To generate a vulnerability scan for the local filesystem, use the dir: and file: prefixes with either absolute or relative paths. For example to scan the current directory:
$ grype dir:.Or a specific file:
$ grype dir:path/to/dirGrype can generate a vulnerability scan from a variety of other sources, such as Podman, tar archives, or directly from an OCI registry even when Docker is not available. Check out the full list of sources.
Generate an Example Vulnerability Scan
For example, to scan an example image with known vulnerabilities, simply run:
$ grype docker.io/dnurmi/testrepo:jarjarYou should see output similar to this:
 ✔ Vulnerability DB                [no update available]
 ✔ Parsed image                    sha256:0f12f881827fc3ca2c093c75966b5080a599
 ✔ Cataloged packages              [218 packages]
 ✔ Scanned for vulnerabilities     [371 vulnerabilities]
   ├── 122 critical, 78 high, 141 medium, 30 low, 0 negligible
   └── 192 fixed
NAME                 INSTALLED     FIXED-IN      TYPE            VULNERABILITY        SEVERITY
bcel                 6.0-SNAPSHOT  6.6.0         java-archive    GHSA-97xg-phpr-rg8q  Critical
busybox              1.34.1-r3                   apk             CVE-2022-48174       Critical
busybox              1.34.1-r3     1.34.1-r5     apk             CVE-2022-28391       High
commons-beanutils    1.7.0                       java-archive    CVE-2019-10086       High
commons-beanutils    1.7.0                       java-archive    CVE-2014-0114        High
commons-collections  3.1           3.2.2         java-archive    GHSA-fjq5-5j5f-mvxh  Critical
commons-collections  3.1           3.2.2         java-archive    GHSA-6hgm-866r-3cjv  High
commons-io           2.4           2.7           java-archive    GHSA-gwrp-pvrq-jmwv  Medium
commons-io           2.4                         java-archive    CVE-2021-29425       Medium
dom4j                1.6.1         2.0.3         java-archive    GHSA-hwj3-m3p6-hj38  Critical
dom4j                1.6.1         2.0.3         java-archive    GHSA-6pcc-3rfx-4gpm  High
fastjson             1.2.9         1.2.31        java-archive    GHSA-xjrr-xv9m-4pw5  Critical
fastjson             1.2.9                       java-archive    CVE-2022-25845       Critical
fastjson             1.2.9                       java-archive    CVE-2017-18349       Critical
fastjson             1.2.9         1.2.83        java-archive    GHSA-pv7h-hx5h-mgfj  High
fat_jar              2.14.1                      java-archive    CVE-2021-45046       Critical
fat_jar              2.14.1                      java-archive    CVE-2021-44228       Critical
fat_jar              2.14.1                      java-archive    CVE-2021-45105       Medium
fat_jar              2.14.1                      java-archive    CVE-2021-44832       Medium
…
Or, generate the same vulnerability scan by first creating an SBOM from the image and then piping the JSON output to Grype to do a vulnerability scan:
$ syft -o json docker.io/dnurmi/testrepo:jarjar | grypeThe output should look identical to the output above.
Choose Your Vulnerability Scan Format
Depending on your use cases, it may be important to use a particular format for the vulnerability scans produced. The most common ones are JSON, Tabular and CycloneDX, all of which Grype supports.
While Grype supports these different formats, they have slightly different goals and features. It may be important to pick CycloneDX for interoperability with other tools or as a standardized format to distribute to downstream consumers.
Generating a Vulnerability Scan in Tabular Format
If your use case requires a spot check vulnerability scan, the default tabular format is typically the quickest and easiest for an individual human reader. No special output designation is required, the example vulnerability scan above is the tabular format.
Generating a Vulnerability Scan in CycloneDX Format
If your use case requires a vulnerability scan in CycloneDX format, Grype has you covered. Grype supports CycloneDX XML (cyclonedx-xml) and JSON (cyclonedx-json). For CycloneDX JSON:
$ grype docker.io/dnurmi/testrepo:jarjar -o cyclonedxAnd you should see a result resembling this:
 ✔ Vulnerability DB                [no update available]
 ✔ Parsed image                          sha256:0f12f881827fc3ca2c093c75966b5080a599de31f110998d09b54658ddffcd15
 ✔ Cataloged packages              [218 packages]
 ✔ Scanned for vulnerabilities     [371 vulnerabilities]
   ├── 122 critical, 78 high, 141 medium, 30 low, 0 negligible
   └── 192 fixed
<?xml version="1.0" encoding="UTF-8"?>
<bom xmlns="http://cyclonedx.org/schema/bom/1.4" serialNumber="urn:uuid:d6883bb8-6c3e-469a-b13e-fe82ece726dc" version="1">
  <metadata>
    <timestamp>2023-09-01T13:54:11-04:00</timestamp>
    <tools>
      <tool>
        <vendor>anchore</vendor>
        <name>grype</name>
        <version>0.65.2</version>
      </tool>
    </tools>
    <component bom-ref="b9b635ef3aaae62e" type="container">
      <name>docker.io/dnurmi/testrepo</name>
      <version>jarjar</version>
    </component>
  </metadata>
  <components>
    <component bom-ref="pkg:maven/com.sun.xml.fastinfoset/[email protected]?package-id=9b39c0f660e077ac" type="library">
      <group>com.sun.xml.fastinfoset</group>
      <name>FastInfoset</name>
      <version>1.2.16</version>
      <licenses>
        <license>
          <name>http://www.opensource.org/licenses/apache2.0.php, http://www.eclipse.org/org/documents/edl-v10.php</name>
        </license>
      </licenses>
      <cpe>cpe:2.3:a:oracle-corporation:FastInfoset:1.2.16:*:*:*:*:*:*:*</cpe>
      <purl>pkg:maven/com.sun.xml.fastinfoset/[email protected]</purl>
      <externalReferences>
        <reference type="build-meta">
          <url></url>
          <hashes>
            <hash alg="SHA-1">4eb6a0adad553bf759ffe86927df6f3b848c8bea</hash>
          </hashes>
        </reference>
      </externalReferences>
      <properties>
        <property name="syft:package:foundBy">java-cataloger</property>
        <property name="syft:package:language">java</property>
        <property name="syft:package:metadataType">JavaMetadata</property>
        <property name="syft:package:type">java-archive</property>
        <property name="syft:cpe23">cpe:2.3:a:oracle_corporation:FastInfoset:1.2.16:*:*:*:*:*:*:*</property>
        <property name="syft:cpe23">cpe:2.3:a:FastInfoset:FastInfoset:1.2.16:*:*:*:*:*:*:*</property>
        <property name="syft:cpe23">cpe:2.3:a:fastinfoset:FastInfoset:1.2.16:*:*:*:*:*:*:*</property>
        <property name="syft:cpe23">cpe:2.3:a:sun:FastInfoset:1.2.16:*:*:*:*:*:*:*</property>
        <property name="syft:cpe23">cpe:2.3:a:xml:FastInfoset:1.2.16:*:*:*:*:*:*:*</property>
        <property name="syft:location:0:layerID">sha256:14bb2fde19899f762ead275eb8d5ad5d5bdf2159bed99583934792a2947303e6</property>
        <property name="syft:location:0:path">/checkmarx.hpi</property>
        <property name="syft:metadata:-:artifactID">FastInfoset</property>
        <property name="syft:metadata:-:groupID">com.sun.xml.fastinfoset</property>
        <property name="syft:metadata:virtualPath">/checkmarx.hpi:WEB-INF/lib/FastInfoset-1.2.16.jar</property>
      </properties>
    </component>
…
…
…

  </components>
There is a lot more data than the table allows, but a different set of data than native JSON because there simply is not a one-to-one mapping of properties between the two.
Generating a Vulnerability Scan in Lossless JSON Format
The last format we’ll talk about is Grype’s own JSON format. If there isn’t a need to provide an SBOM to other tools and you may be using Syft to generate the SBOM, the format with the highest fidelity is the Grype JSON format. Both tabular and CycloneDX lose some amount of information from the initial Grype data model whereas the JSON lossless format does not.
Although Grype works great with SPDX and CycloneDX SBOMs, there could be a situation where data was lost converting to one of these formats and Grype matching uses some of that extra data, so using the Syft JSON might make the most sense. To use the Syft JSON format, use the -o json argument.
Create Your Own Format!
None of the previous formats fit your use-case? You can even create your own custom format. Grype export formats can be customized utilizing the Go templating syntax. If you’re interested to learn more, our team wrote an entire blog post about how to create your own custom Grype export format.
Next Steps
Now that I have a vulnerability scan, what do I do with it? Each organization will have their own specific integration and deployment process. Below is a generic example of what this might look like:
- Create a Change Request Ticket (e.g. GitHub Issue, etc)
- Prioritize the Ticket
- Assign the Ticket
- Create a Draft Change (e.g. GitHub Pull Request, etc)
- Create a New SBOM (e.g. with Syft)
- Scan the New SBOM (e.g. with Grype)
- Merge the Change into Main Code Branch (e.g. GitHub Merge, etc)
Following these steps you can create a process to systematically act on newly discovered vulnerabilities in your software and take the appropriate steps to remediate the vulnerabilities before they are exploited.
Managing Vulnerability Scans at Scale
This works good and well for a single developer workflow but as organizations grow and are attempting to scale the software supply chain security practice doing all of these steps manually quickly becomes untenable.
A purpose built software system to manage vulnerability scans and their associated SBOMs becomes imperative. An automated system that collects and stores all of this metadata enables additional features such as automated alerting for new vulnerabilities and automated policy enforcement to prevent vulnerable applications from moving through the CI (build) or CD (deployment) process.


